What happens when ready to break ground for a home addition?
Continuing where the last post left off, I’ll now describe what you should expect from the build portion of a home improvement addition project.
Now that the permit is in and plans are ready, it is time to break ground. This literally means that it’s time to excavate a hole and prepare for a foundation. Although this sounds like a clear cut and simple task, there is quite a lot involved, and this portion of the work is critical. The excavator will first contact Dig Safe, and then dig out the required and specified areas. There are times when things such as sewer pipes, water pipes, or old septic systems can be obstacles in the process. This can seem like a big deal, but there are ways to deal with each unique barrier to the dig.
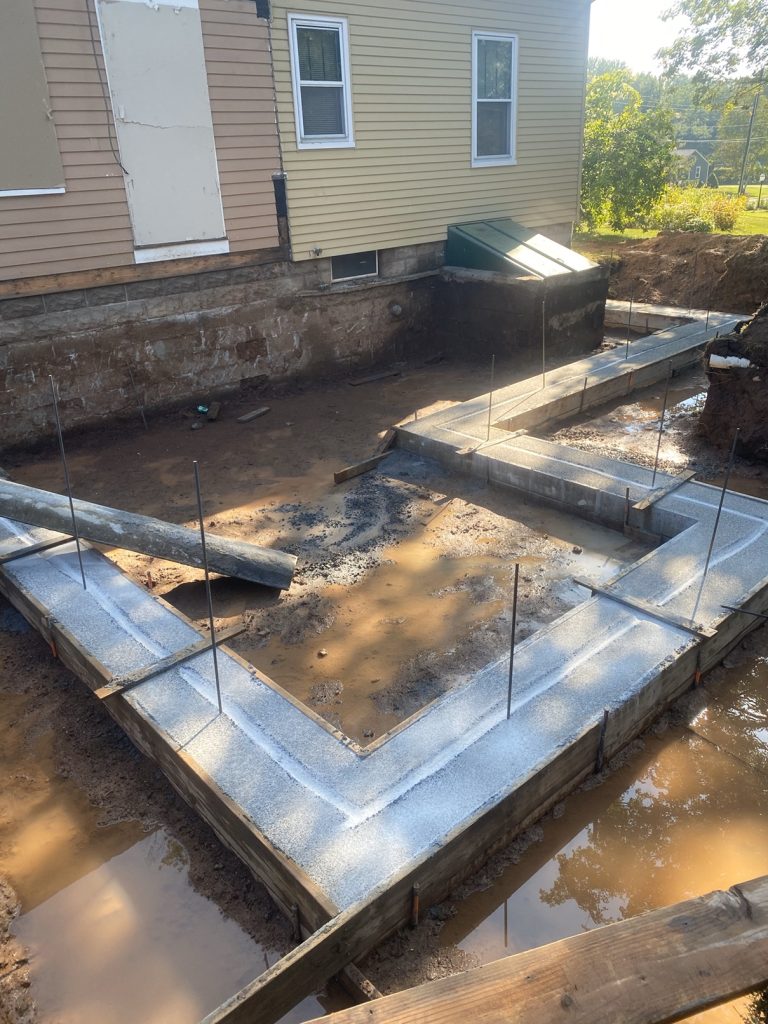
Once the hole is dug to depth, the forms are set to pour the concrete footings around the perimeter of the foundation. The footings are what the concrete walls will sit on. They are wider and thus act like feet in a sort of way.
During the footing process comes the first of many building inspections. Upon successful completion of the footings, the walls are formed and rebar is put in around the perimeter. This phase requires another building inspection. At Platinum Construction we always develop a positive relationship with the inspectors which speaks highly to the quality of our work.
Once the walls are formed and the forms stripped, the foundation is ready to be waterproofed and footing drains installed. This process involves painting the foundation to grade with a liquid asphalt product. Although some places only require damp proofing, most in the CT and MA area require waterproofing. Footing drains are a series of corrugated piping and stone applied to the exterior of the foundation footings and gravity drained to bring water away from pooling at the base of the foundation. This process is often accompanied with other drainage work in the areas where there are gutter downspouts. In a similar fashion, a system of underground pipes will collect the accumulated water from gutters and disperse it through the tubes by gravity and away from the foundation of the house. This work is often planned for and in conjunction, with a common goal in mind, to move water away from the house.
Another required step before the last of the foundation inspections is the installation of a vapor barrier inside of the foundation. This requires a plastic barrier installed under the gravel floor of the new crawl space foundation. Once the drains are in, waterproofing is completed, and the vapor barrier installed, it is time for another building inspection. Once passed and completed, the excavator will backfill the outside of the foundation and grade the site to divert water away from your new foundation.
At this point, it’s time to start the framing process. This process starts with the deck of the new addition being constructed. The sill plate, floor joists, and decking are put on, creating the new subfloor. From here walls are erected with window and door openings along with the proper headers installed. Upon completion of the exterior walls, the roof frame is built and sheathed in plywood. It is at this point the permanent roofing, doors and windows are installed. This leads to a weather-tight shell.
Depending on the project, at this point exterior decks, siding, and gutters are ready to be put on. Often while these phases are happening outside, rough plumbing, heating, and electrical are completed, along with standing any remaining non-load bearing partition walls. Final framing, rough electrical, and rough plumbing, and rough heating will all require individual inspections from the building department.
Once these have been completed, we’re now ready for insulation and yet another inspection once completed. The ceiling, floor, and walls will all need to be insulated with the proper R values per local building code. Many insulation companies use software to provide a Rescheck to ensure that your project meets updated IBC and local regulations.
After insulated and inspected, it is time to sheetrock, tape, and mud the project. This step involves the hanging of all wall sheetrock. This requires attention to detail with all joints, corners, and cutouts for lighting, plugs, switches, etc. Once hung, the joints where the sheetrock meets and all corners are taped and 3 coats of joint compound is applied. This is called the mudding process. There is light sanding, and upon completion the project is ready for paint.
Depending on the project, this is a time when “finish” work takes place. This may include hanging kitchen cabinets, flooring, tile work, bathroom vanity, toilet, shower, all window, door, and baseboard trim, and any other detailed work required. The order and specificities of this phase highly depend on individual projects as well as professionals and customer preference.
Once completed, the addition project is ready for paint on the ceiling, walls, doors, and trim. Generally one coat of primer is applied first, and then two coats of finish paint. Once painting is completed it is time to hang final lighting, heating registers and thermostats, switch plates, hook up sinks and other plumbing that has not already been done, and complete any remaining odds and ends that are left. When the project is completed a final inspection is completed and it is time to enjoy your new space for years and years to come.